Showing posts with label Beads. Show all posts

Monday, July 28, 2014

DIY: Wire me knot! :)

Hello DIY! :)

Wired Beaded Bracelet :)

What you'll need
1. Gauge Wire
2. Jewelry Wire
3. Beads 
4. Plies

1. Cut the wire according to the size of your wrist

2. Connect the wire by twisting it's ends. 

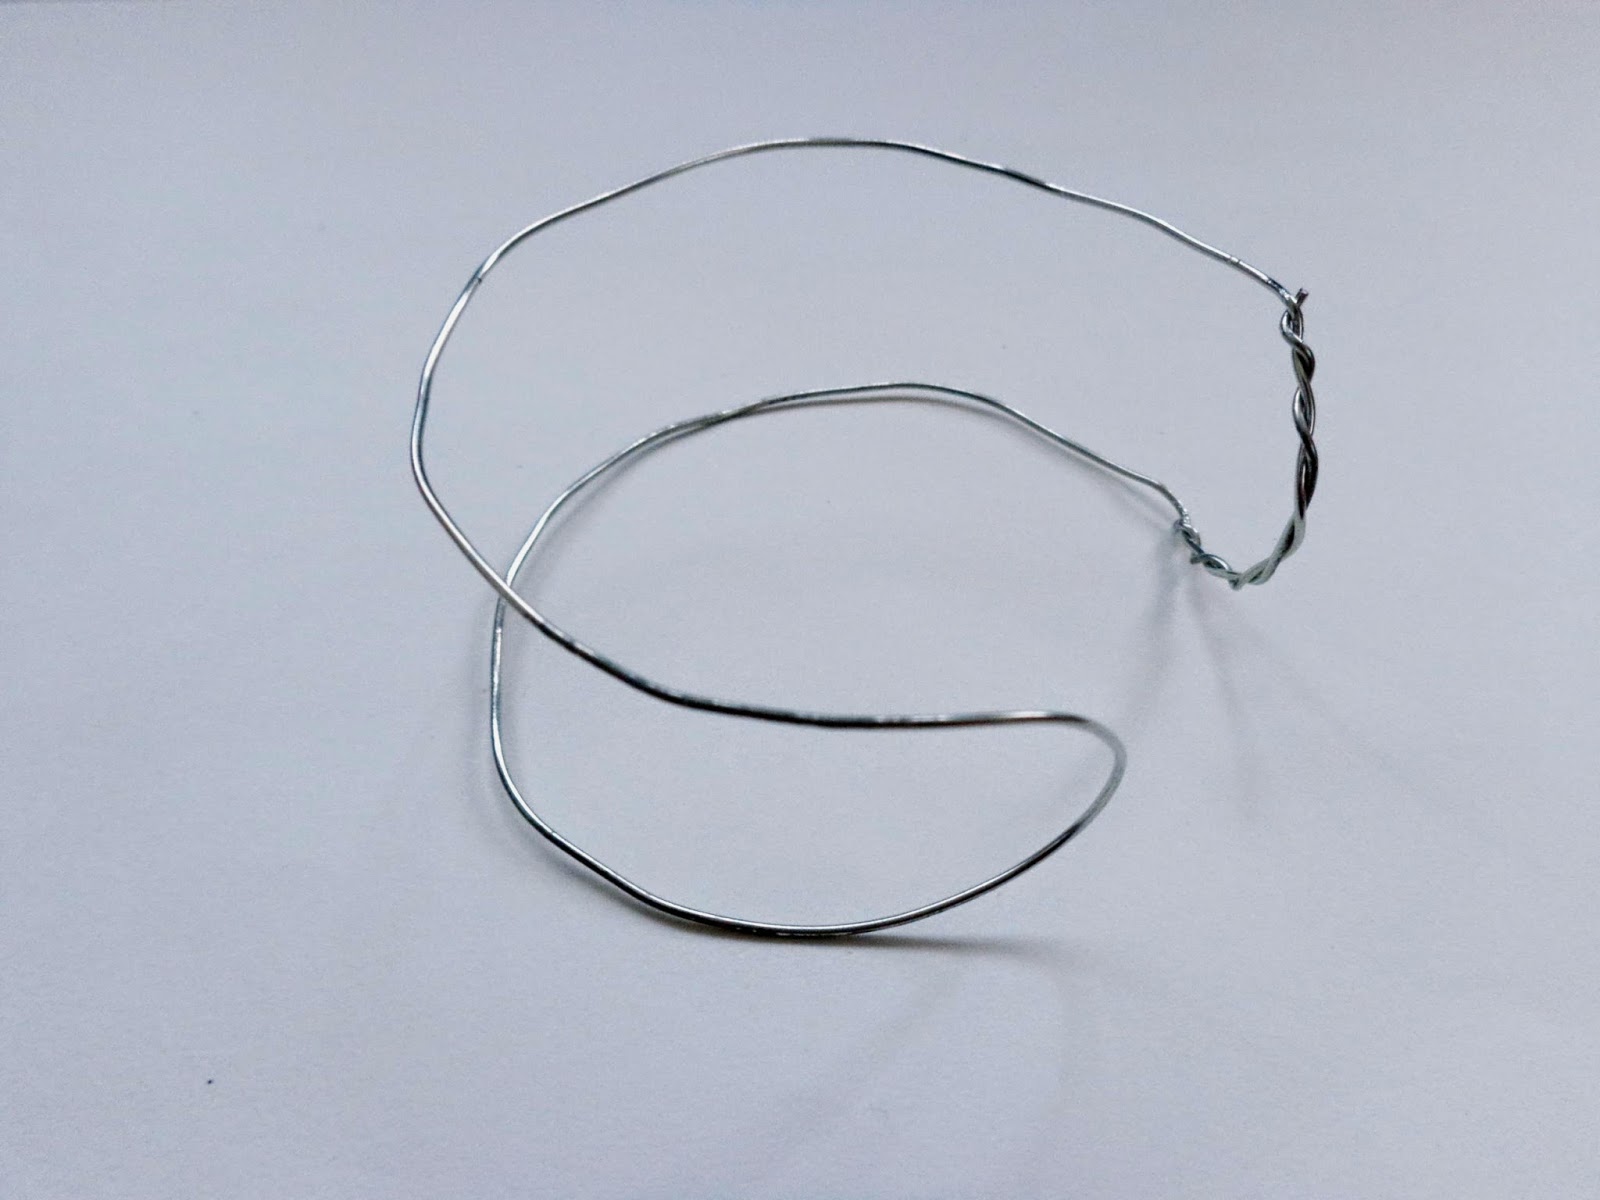
3. Form it like this :D

4. After forming your wire, wrap your bracelet with Jewelry wire

5. Then fill them with your beads. You can use any type of beads for this, but since this are the only beads I found on my drawer so I obviously use this.

6. After filling your bracelet, tie a knot to secure your bracelet, or twist it on it's sides. 


Tananan! Your Beaded Wire Bracelet is done :)

All I can say is this bracelet is a bit "matrabaho" (has a lot of work to do). Especially when putting your small beads to your jewelry wire. But once you've finished making them, it's worth a lot of effort!

You can also put charms on the middle just like the photo on the very beginning! Why spend so much on accessories if you can make one! So until our next DIY! :) Thank you for taking time reading my blog! :)


Thursday, March 20, 2014

Tiffany! :)

 Hi guys! here I am again with my new DIY. :) So I'm currently obsessed with Girls Generation "I Got a Boy" outfit :) especially Tiffany-shi's Cap :) Since it's a bit Hip Hoppy I decided to make my own :) Well obviously it's not as pretty as Tiffany's but here's my quick DIY Cap :)


Here's a closeup of Tiffany's cap :) 
What you'll need 
1. Old baseball cap (any you would like to design)
2. Beads
3. Needle and Thread
4. Glue Gun
5. Old notions ;0
6. Butterfly wings (for the Wing design)


First, you need to sew your beads on the left side of the cap. 
Once you finished putting beads on your cap, place your notion on the top of your beads. For me, I used my old earring for the main design. hahaha

Followed by your mini wings; Since I don't have the same wings as Tiffany's,  I cut the wings from one of my "butterfly" scrapbook pieces.


here, she looks like :)


 Once you have placed your beads, your all done with your Tiffany Cap :) It’s just up to you whether you want to put more beads on your cap

You're very own Tiffany Cap. :)

So why spend too much on your accessories if you can make your own. Less expenses more fun! :) 

Once again, thank you for your time reading my blog! Until our next DIY! :)


Monday, January 13, 2014

Meow Meow :)

Cat Ears are hip nowadays, and had captured the world of fashion last year. Every girls ages 10 years old and above are into this fashion headband that even girls my age are into this "kawaii" hair accessory. Taylor Swift and SNSD are the few well known celebrities who had introduced cat ears in the world of fashion. And since I can't afford to buy a Cat Ears on my own, hahahaha why not make one.....


Insert Recycle name here (hi I am Jake and I love to recycle stuff).... :) Here are the tools I used in making my own head band meow meow :) Old Beads, Wire, Headband, Plies /Wire cutter


First, I straighten my wire and formed into a cat's ears, and cut the wire according to the size that I want. Then inserted the colored beads on the wire and attached it on my head band. And walla! you have your own cat ears. :) 

Finish Product :) 


MEOW MEOW MEOW :D

Featured Post

26 things I have learned in Life and in achieving my dreams

Happy Birthday To ME!! Feelings about being 26, well not that much, I still feel the same but this time I am a little bit of “gigil” in d...